
2021 Himalayan Upgrades, Modifications and Accessories


2021 EFI SWITCHABLE ABS MODEL THREAD – Scroll down for latest updates
I recently purchased a 2017 model Himalayan from Paul, a fellow member of the Royal Enfield Club of Australia, who had already placed an order for the new EFI Switchable ABS model. Not having ridden one before, I wanted to test the Himalayan out in the bush, which you really can’t do on a dealer demo. I wanted to see if I liked how it went off-road and on the highway, not just around the block. I had seen another member Peter, ride his on twisty tarmac on country roads and it seemed to go pretty good. So since there was quite a wait for the new models I bought the bike off Paul without so much as a test ride. I then had some time to try it out and make a decision.
After some test rides on the Hume and Pacific motorways, I knew it was going to be similar to other Royal Enfield singles, more of an 80-100 kph “B-Road” bike. At 110kph indicated it sits at about 5500 revs and the red-line is 6250rpm. At 100 on the speedo, you are doing 92-94kph on the GPS.
I went on 3 off-road rides for which I did trip reports ( see below )
Watagan’s ride in the mud with Peter http://www.k10stuff.com.au/motorcycles/watagans-forest-ride/
Wombeyan Caves Road with DSMRA http://www.k10stuff.com.au/uncategorized/dsmra-taralga-adv-ride/
And a ride around the Hawkesbury with Paul http://www.k10stuff.com.au/motorcycles/wisemans-ferry-and-colo-dirt-ride/
Earlier this year there was an extensive delay in getting new bikes out of India to Australia so the wait time was 6 weeks or more.
For a period of time I had been enquiring as to availability, lead-time and colour options and hadn’t actually committed to putting a deposit on one as yet when I received a call from Santina of Revelry Cycles saying that there was one available, due to land in the country very soon and it was Lake Blue. I bit the bullet and placed a deposit.
As soon as I knew I had one “in the bag” I went about planning what accessories and modifications I would do.
It’s taken a while to compile this info but here it is.
Suspension
On my 2017 bike the rear shock had sagged a bit and the front forks felt very soft.
Having dealt with the guys from SuspensionsRUs in the past with my Triumph Tiger suspension fix, I decided to go with their recommendation of YSS and purchased a shock and fork kit.
I actually ordered the kit for the old bike but never fitted it as a 2021 model became available quicker than expected.

As you can see, in a feeble attempt to create progressive suspension the OEM spring has tightly wound coils at the top, which just bind up quickly and you end up with half a spring. The OEM fork springs are the same.
The YSS shock has rebound adjustment and a threaded-ring preload adjustment. This gives you more tunability but it requires you to remove the rear internal guard to perform preload adjustment as the OEM shock is run upside down and the preload is at the bottom allowing easier access.

Installation required the removal of the battery and airbox in order to fit the shock


Since I do some rides with luggage and others without, I decided to trim the bottom off the guard to expose the preload adjuster. This means I don’t have to remove anything to make adjustments to preload settings.

The YSS fork kit comprises new fork springs (without the tightly wound coils at the top), PD (Progressive Damping) valves which act as cartridge fork emulators, new preload spacers to suit the spring length change (due to insertion of the PD valves), and preload-adjustable fork caps.
The upgrade was not as hard as I imagined and gave me the opportunity to remove some items that I deemed unsightly.
I started out by removing the wheel and then the brake calliper and ABS sensor. Then it was time for the fork brace and mudguard, which I had plans for.

I got one fork off and then followed the instructions which advised me to remove the oil and replace it with 20W.
To get the oil out you need to turn upside down and purge all the oil by pumping it until the oil stops coming out. I bought 1 litre of Bel-Ray 20w as the fork kit only came with a 250ml top-up bottle of YSS fork oil. You need about 410ml in each leg and an air gap of 220mm which I checked using a tape measure set to about 222mm and used it like a dipstick. You can buy a fancy contraption from MX Store if you want to be 100% precise. Then I installed the preload-adjustable fork caps.
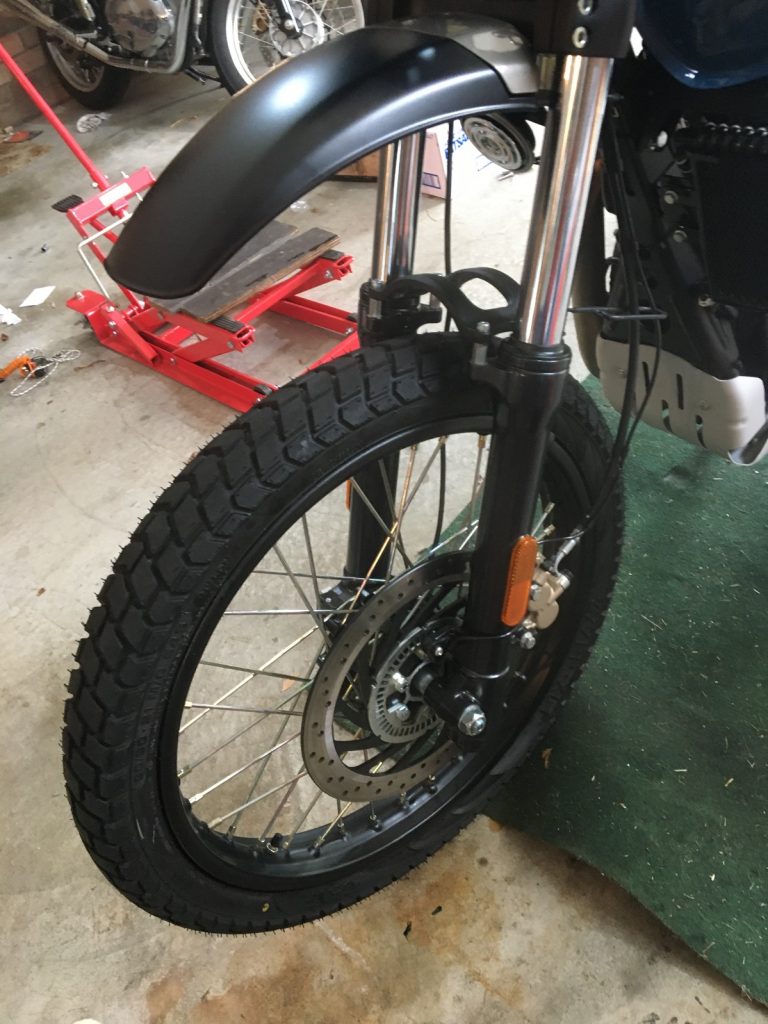
Once I had done both I reinstalled the forks. I chose to leave the gaiters off. This will spark some debate but I want to be able to achieve two things. Firstly, improve the look. The chrome fork stanchion breaks up the all-black appearance of the standard forks and secondly allows me to monitor fork travel by being able to see the tell-tale rings of oil/dust left on the fork legs and then adjust preload accordingly. Another thing is preventing trapped moisture from coming in contact with cheap Indian chrome and damaging the forks.
Where’s the mudguard you ask ?. Not quite in the bin but it really does look terrible. I did put it back on recently for a road trip where we expected lots of rain but for off-road riding, I think I will leave it off for the interim and see how it goes.
UPDATE – the mudguard would be in fact useful in heavy mud to prevent the oil cooler clogging up but on a recent 300km trip on wet dirt roads the spray pattern seemed similar to another bike with the mudguard fitted.
Dirt bikes don’t have a guard that runs within a centimetre of the front tyre, so I came up with a solution to raise the fork brace, to which the mudguard attaches, by 20mm.

This was an easy $10 fix from Bunnings Hardware. PS these are the 2 left-overs – you need 4 of each.
Bark Busters, LED indicators and Tail-Tidy
One thing I have found with dirt bikes is that blinkers are sacrificial, they will either be knocked off the bike or fall off eventually due to the rubber mount perishing or succumbing to vibrations. I needed to get Bark Busters so I went for the optional LED indicators as well.

I went out to see the nice people at Motorradgarage and picked up a set of Barkbusters and LED indicators and a SW Motech EVO High Beam Switch for the LED lights
This gave me an idea for a “Tail-Tidy” that would lead me to another modification.

On the 2017 bike, the taillight was just about to fall to pieces. I took it apart and had to buy some new screws to hold it together. Knowing this would probably also happen on the new bike I wanted to replace it. The pannier racks include a blinker relocation kit mounted on the cross brace and this had a flat section perfect for a flush-mount LED tail/brake light.

I ordered this one from Third Gear for about $25.
The Bark Busters LED indicators are curved to suit the shape of the handguards. For me to be able to use them on the rear I needed them to be flat. So I had to cut off the plastic contour with a hacksaw and then encapsulate them with epoxy. I could then mount them with double-sided tape to the 125mm x 50mm Aluminium angle that I cut 40mm wide to fit the tail light mount. I sprayed the angle satin black to match.
Wiring was a pain. I didn’t want to chop the existing connectors so I could put it all back to factory spec. A trick I used on the tail-tidy I did on my 650 Interceptor was to make up a new rear wiring loom for the new indicators and lights. The LED indicators require some resistors to control the flash rate and these had bullet connectors which I removed and added spade connectors to match the original indicator connectors. Job done, nothing chopped or hacked. The tail/brake light also had a separate loom which had a plug under the pillion seat, so I disconnected that with the OEM taillight and used spade connectors to fit into the plug. Again no cutting off plugs from the original wiring.
AMMO Box
Once the bulky-breaky tail light was removed there was all this space between the rack and the pannier cross brace and the panniers themselves. I started hunting for toolboxes and then had an idea. A flat-mounted ammo box from Repco would fit and allow easy access and would also have a sealed lid. I decided to utilise the taillight mount, as being pressed metal, it was fairly rigid and already had some rubber grommets perfect for providing a good vibration-free mounting point for the ammo box. The Bark Busters kit was designed to suit both the Himalayan and the KTM 390 and, for the latter, it came with 2 aluminium spacers for the bar ends which were surplus.

I used these, coupled with rubber washers, to act as stand-offs from the cross brace and they lined up the ammo box perfectly with the taillight mount.

Drill a few holes and fit some rubber and nylon washers and fixings and it was done.

I then found a suitable first aid kit from Office Works that fit the internal dimensions and added a bit of bling with a Sandleford First Aid sticker.
SRC Accessories
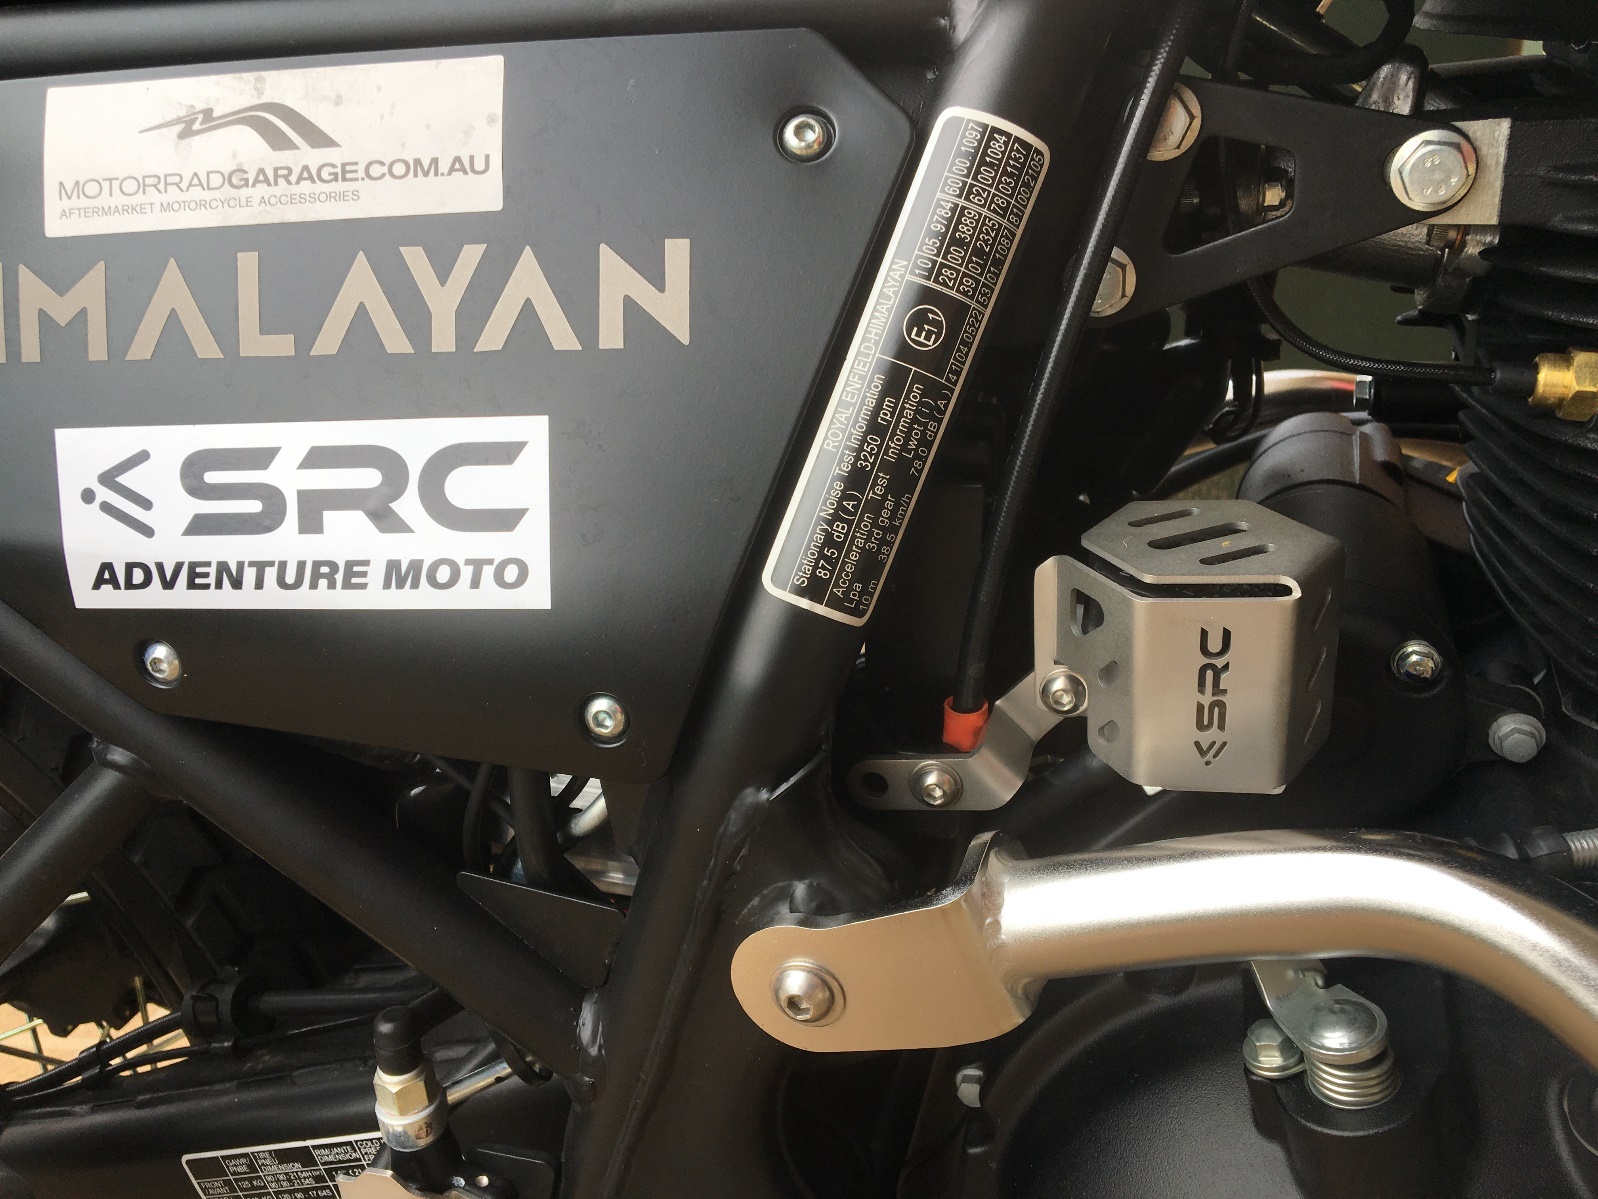
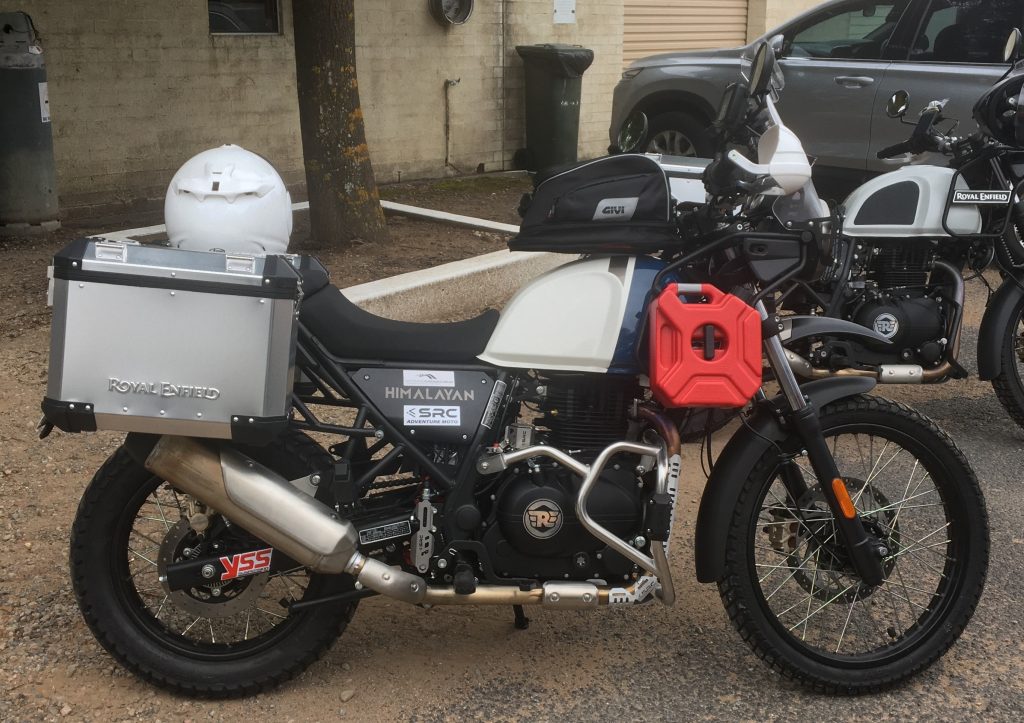
Speaking of bling, SRC Adventure Moto make some pretty good looking and practical accessories for your Himalayan and are very helpful with full instructions in PDF and follow-up emails from Tony the importer.
I think the only thing I haven’t got is the side stand foot enlarger and the rear cargo rack.
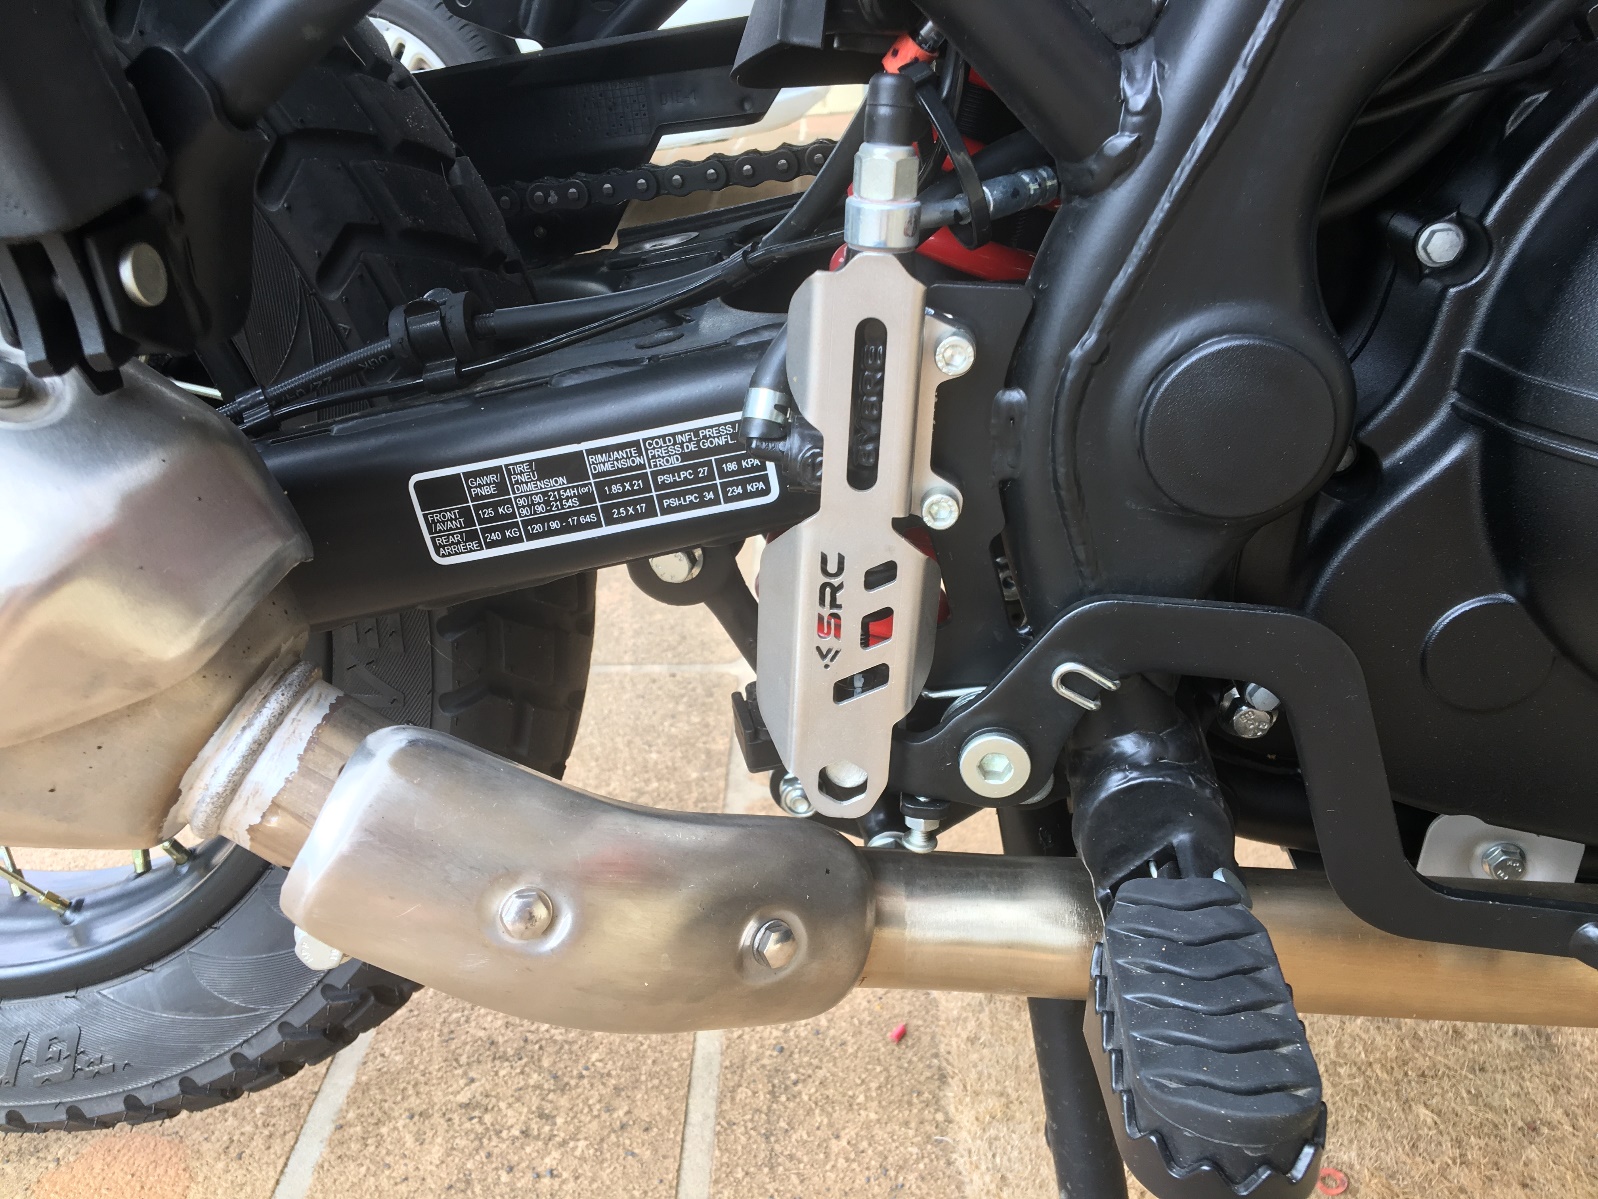
REAR BRAKE MASTER CYLINDER GUARD
REAR BRAKE FLUID RESERVOIR GUARD
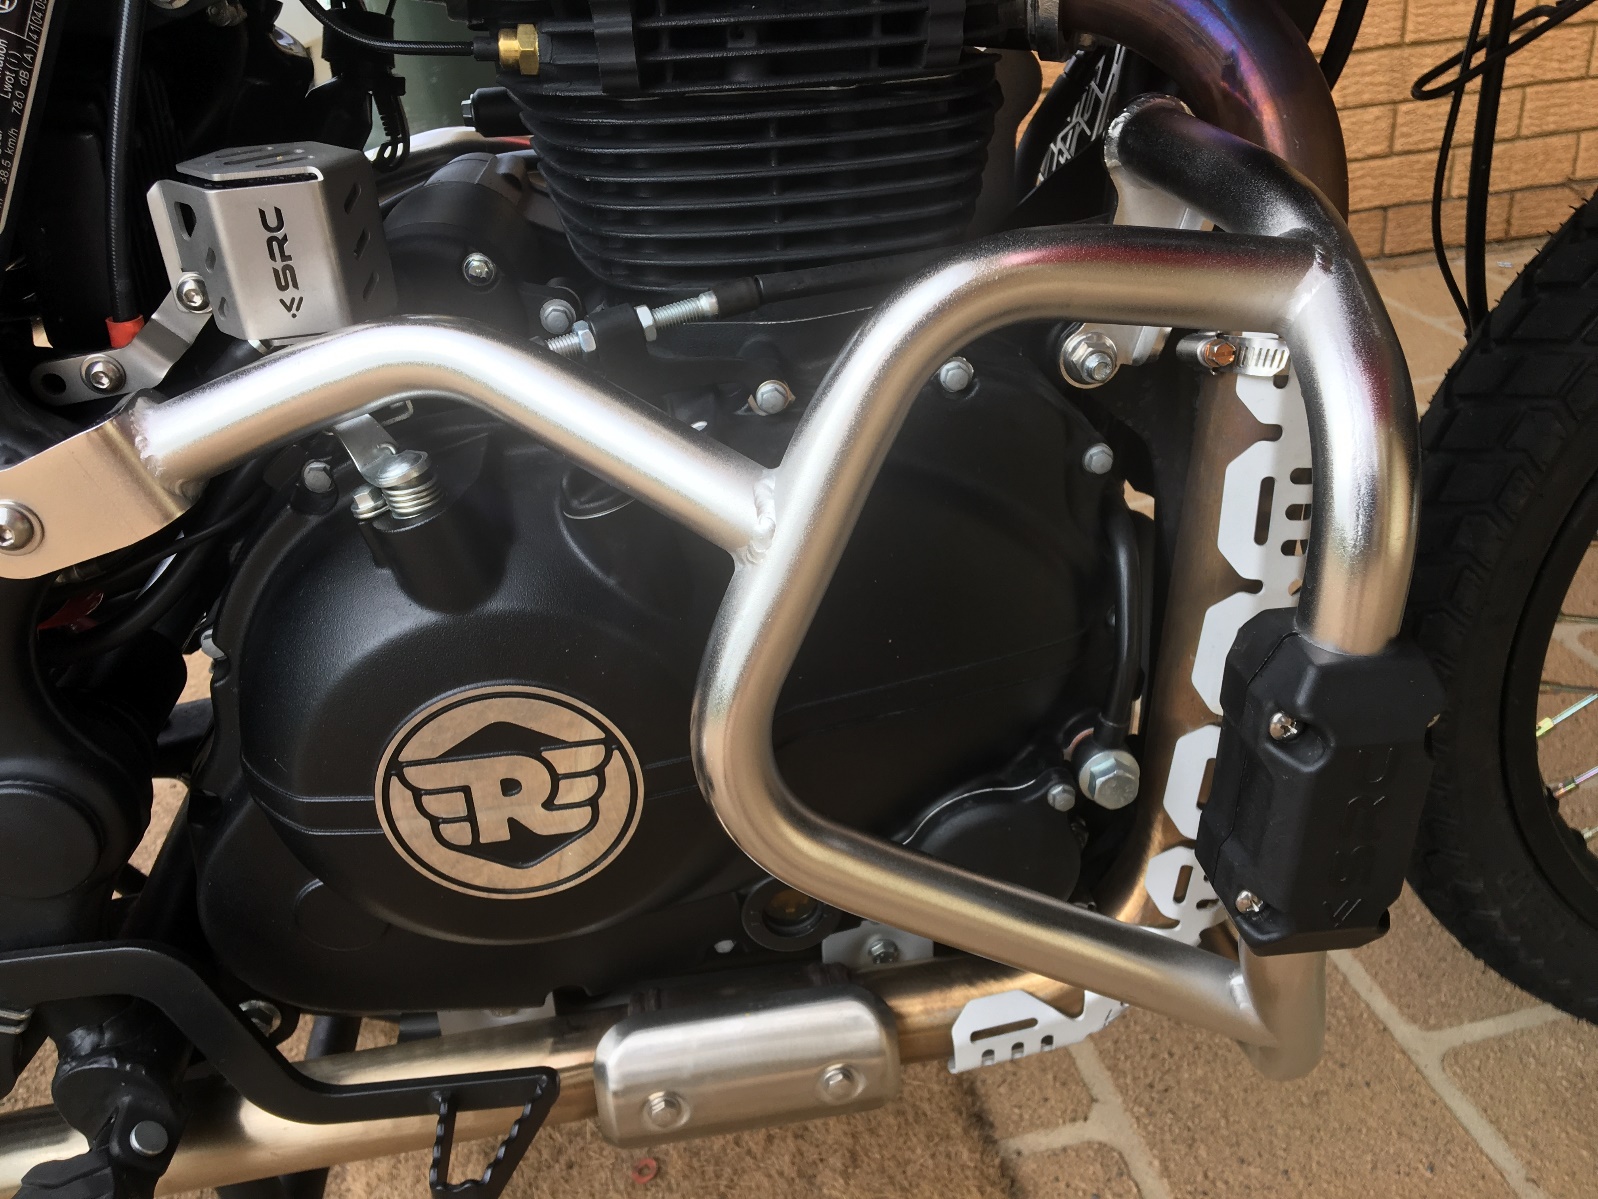
CRASH BARS

EXHAUST HEAD PIPE GUARD
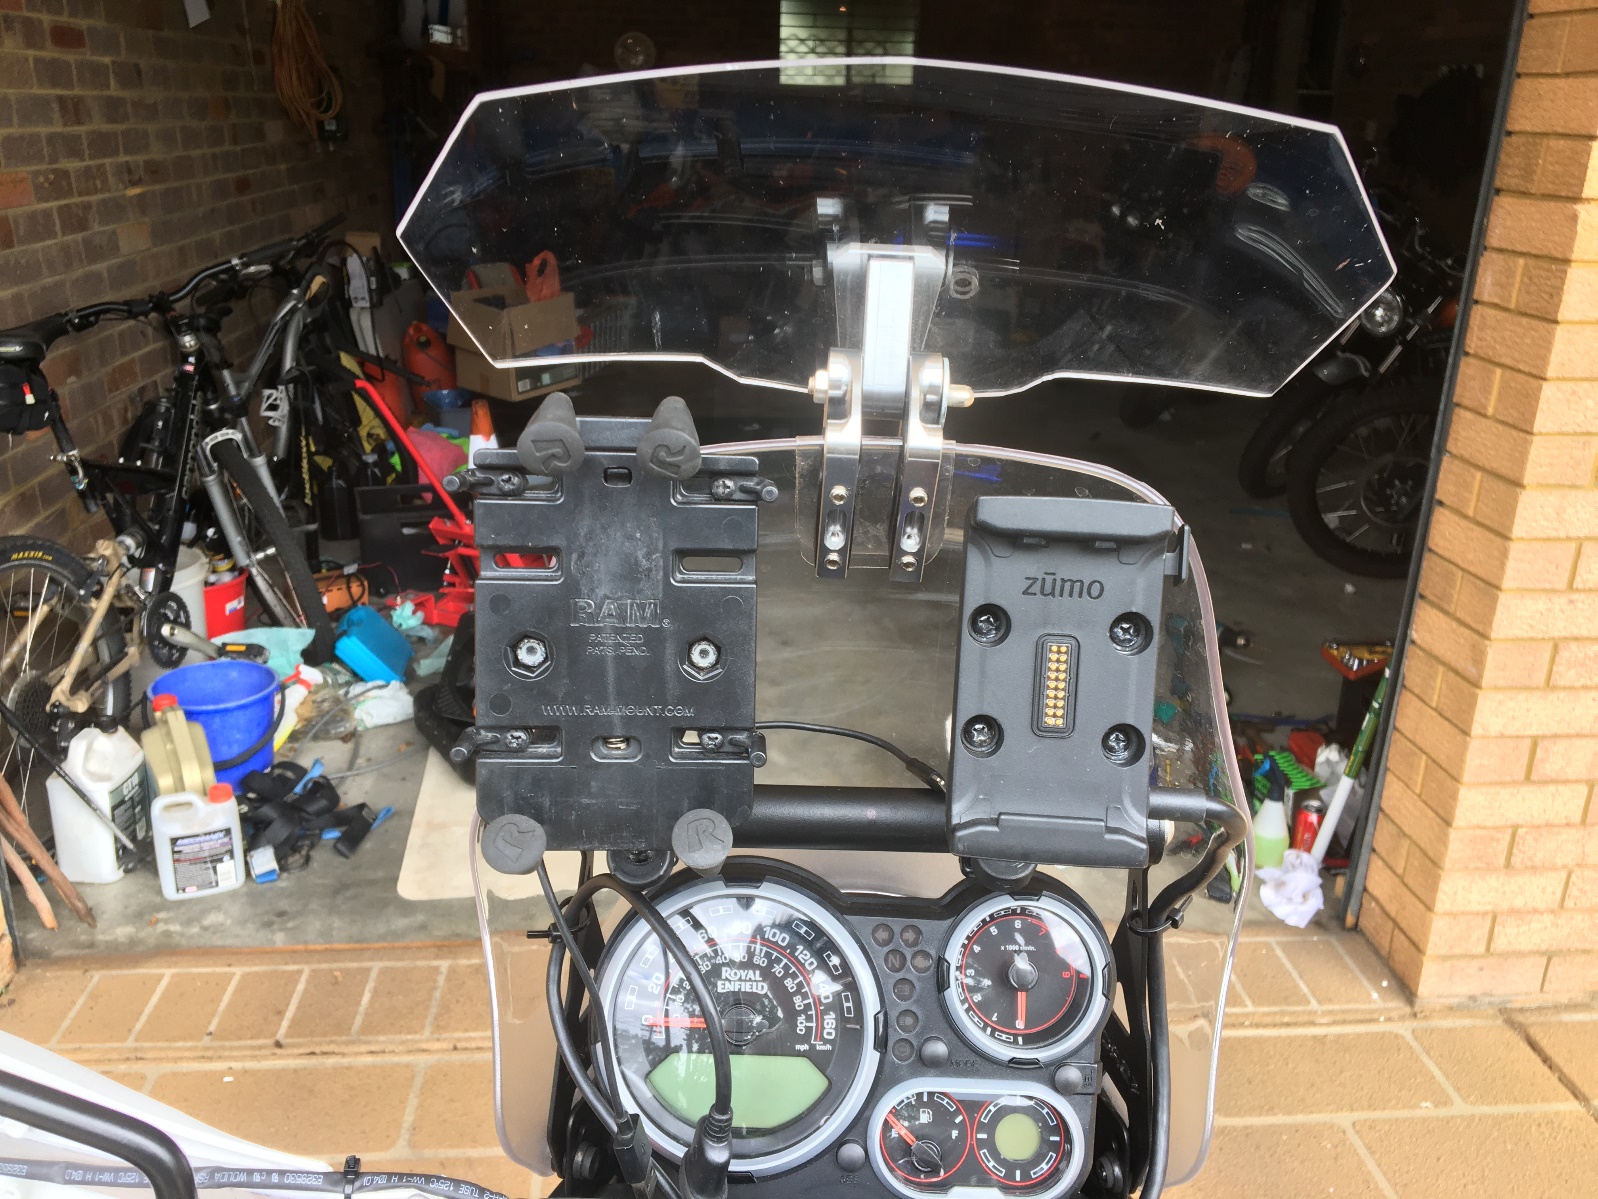
GPS BAR
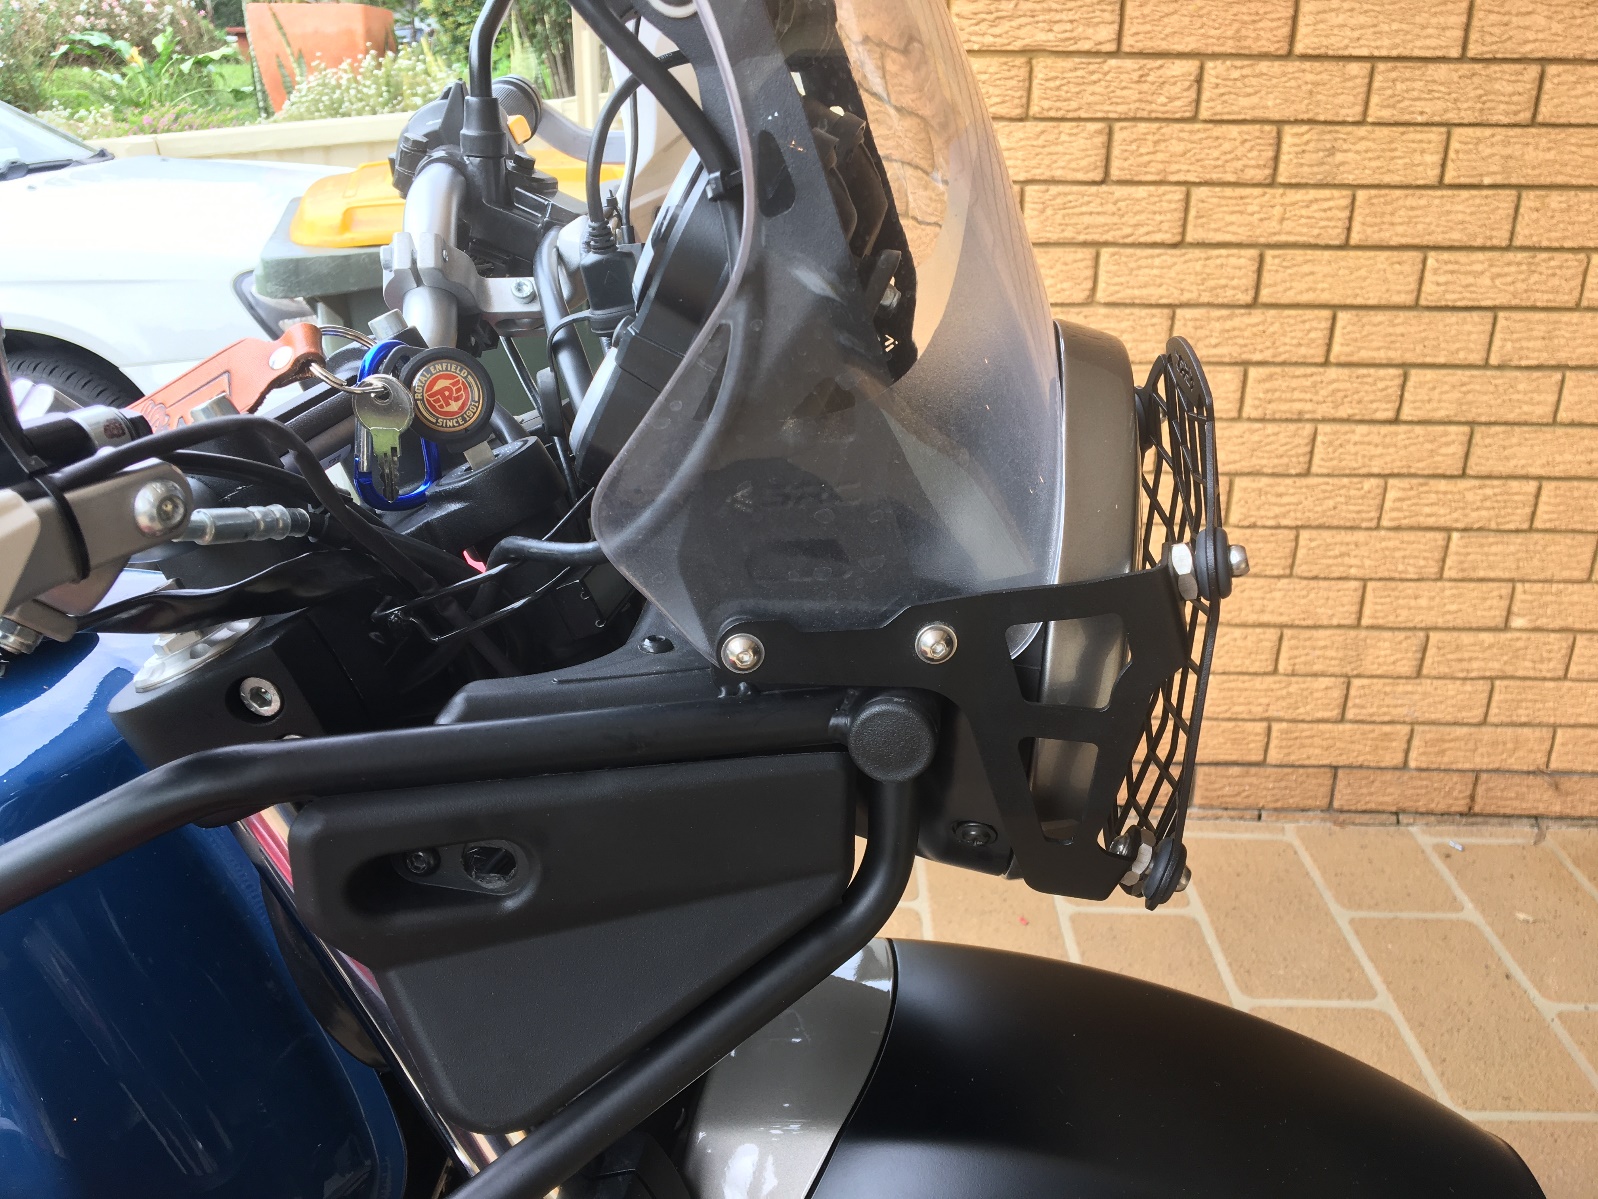
HEADLIGHT GUARD
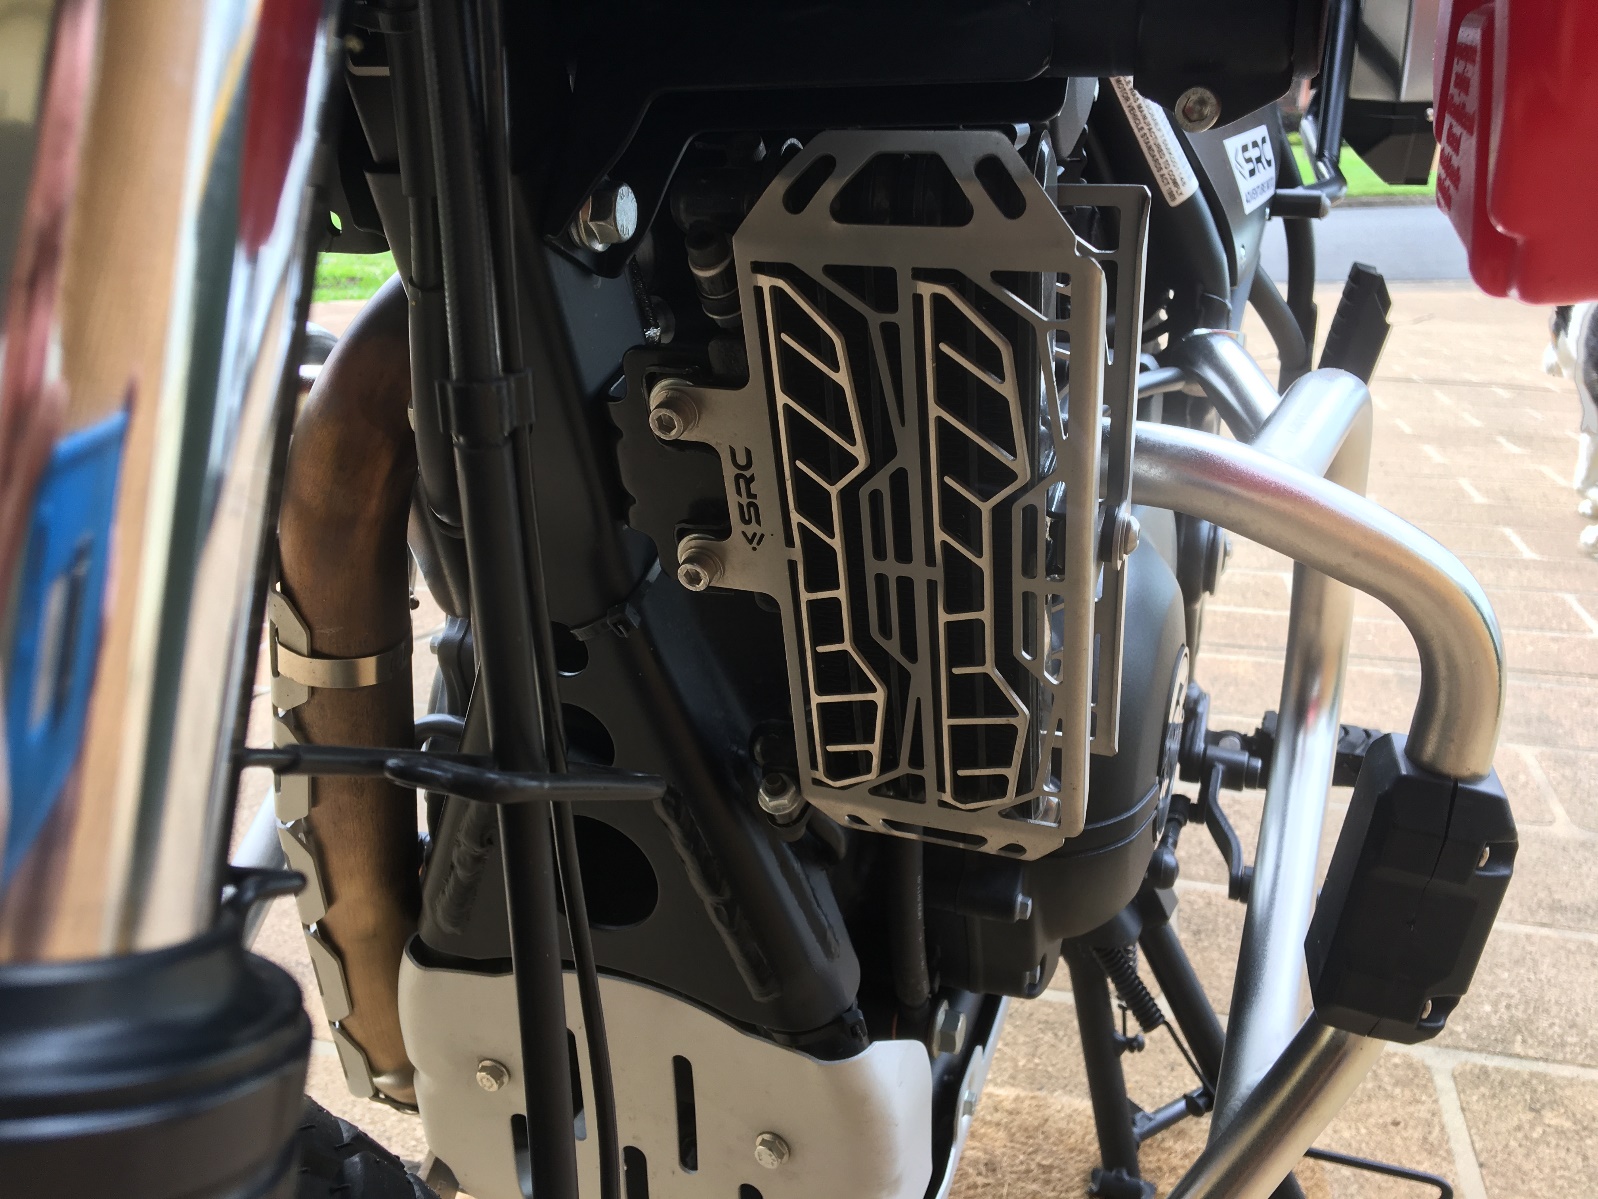
OIL COOLER GUARD
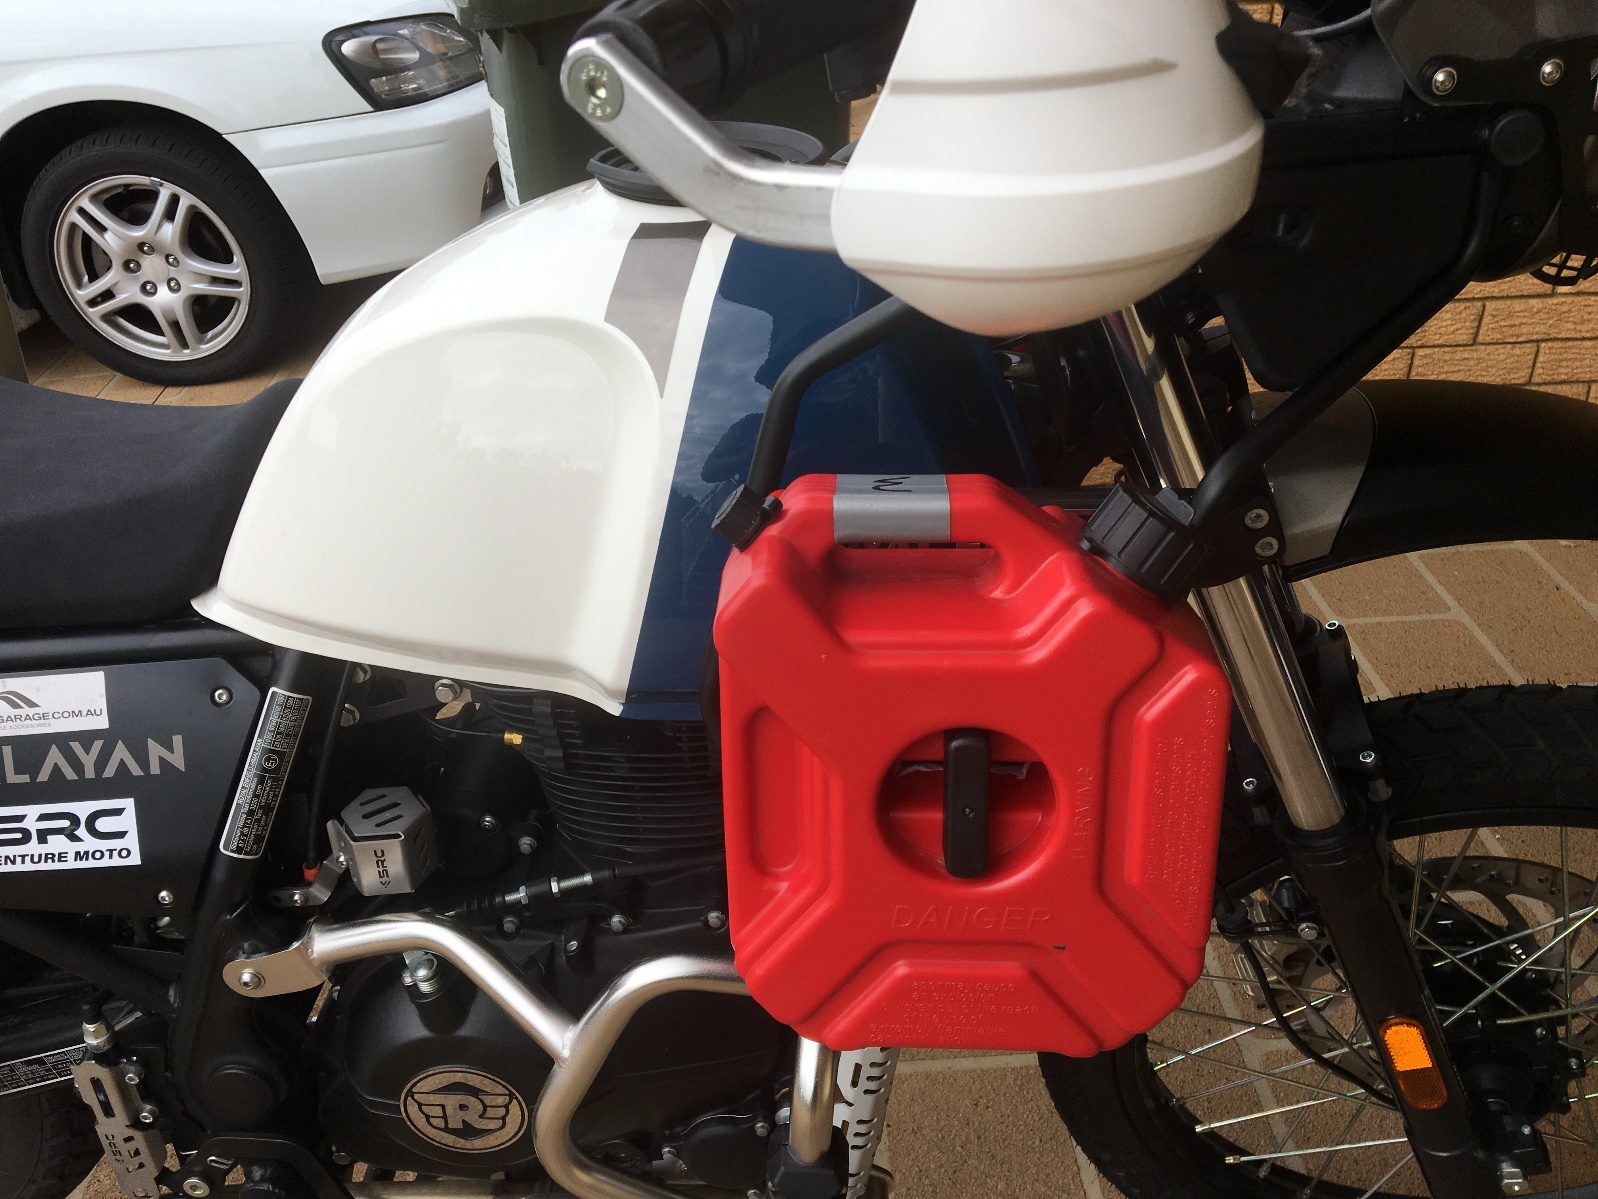
FUEL TANK + BRACKETS (3 LITRE CAPACITY EACH SIDE)
So I use one of the 3 litre tanks for fuel and the other for spare water, not drinking water as the tanks are not food grade plastic. When camping after a day riding dusty roads it is handy to have some spare water to have a wash and for washing up cooking gear without using your drinking water.
There are 1 Gallon (3.8L) ROTOPAX water tanks available from Motorradgarage if you need extra drinking water.
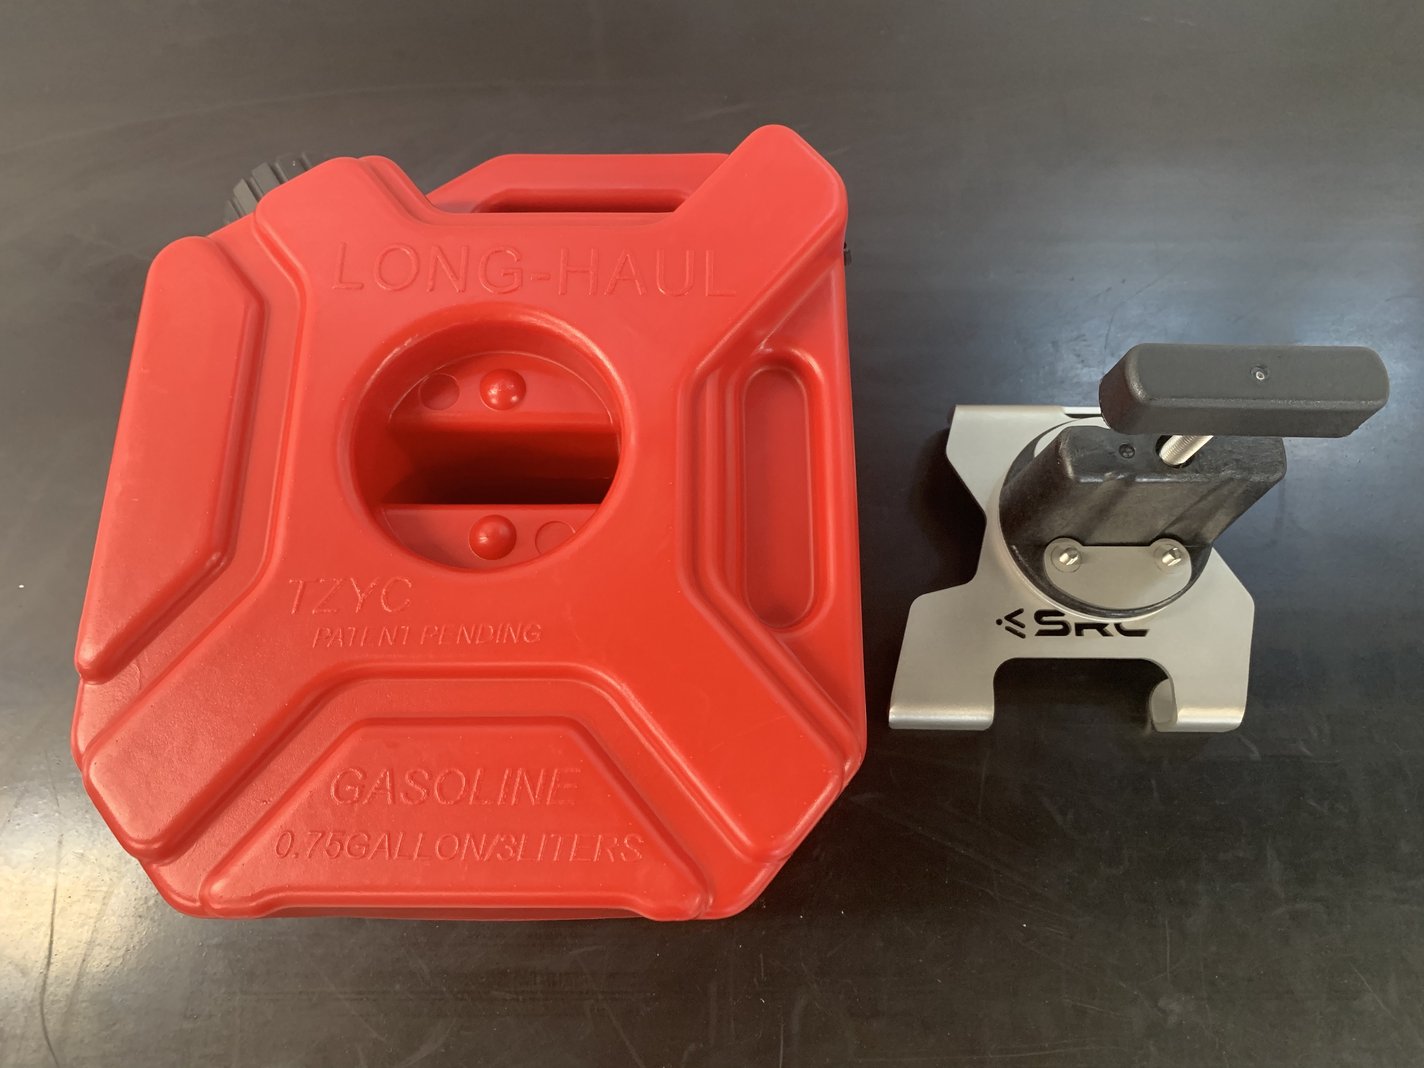
FUEL TANK AND BRACKETS
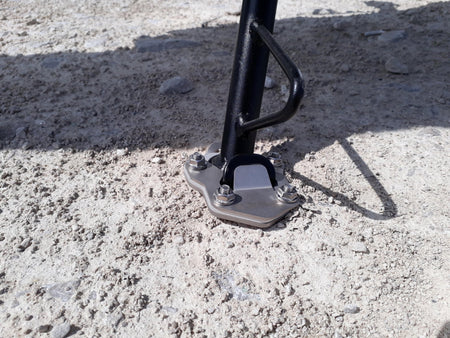
SIDE STAND FOOT ENLARGER
Seat Improvement
A lot of people in the Royal Enfield Club swear by Air Hawk seat cushions so I thought I’d try one, so I picked up a Dual Sport model from Motorradgarage whilst I was there .
There was an article on the internet talking about the curvature of the seat causing problems and making you lean forward onto the tongue of the seat etc. As it turned out I had the same problem. The fix is to cut a section of foam mattress and place it under the Air Hawk. It stops the seat from collapsing into a curve and allows the air valve to sit behind it, which was sticking into my butt cheek.


EEZEE RACK
Glen from the Royal Enfield Himalayan Australian Group on Facebook makes some useful accessories for the Himalayan.
Ezzee Rack Pillion Seat Rack with legs (makes camping stand)
I had some throw over panniers that I tried to use on the old bike and found that they hung too low and I was also concerned they would damage the pillion seat. Once I saw Glen’s rack on Facebook I ordered one and it fixed both of the problems.

This is the standard model above
The main supports fit into two mounts that attach to the frame and is secured with R clips. At the rear it has a mount that clips over the first bar of the standard Himalayan rear rack.

When I got the new bike I ordered another one but this time the camping version which has legs at the rear that fold down to make a stand for pots or other utensils.

The addition of a MX bar pad makes a great back rest

I used it on the last camping trip to keep the soft esky off the mud and wet ground.
Ezzee Stand (for changing front tyre)
When you put the bike on the centre stand it raises the rear end which is great for oiling the chain. However, the front tyre is still in contact with the ground as the balance point of the centre stand is forward. Removing the front wheel can sometimes allow the bike to rest back on the rear wheel. There usually is weight on the front tyre which makes it hard to change and then can result in the forks ending up on the ground once you do remove the front wheel. At home in the workshop I use a piece of wood or a hydraulic stand however this is not available in the bush.
The Ezzee Stand mounts to the A frame section of the bike’s down tube, between the steering head and the bash plate. It uses a hook welded to it to slot in one of the holes in the frame brace and its own natural tension holds it there. I had some interference with the SRC crash bars so I bent it slightly to fit and added some Velcro to secure it.
When in use it is removed from the bike and the large hook at the top is inserted into the centre slot of the bash plate and when you push it back it raises the front tyre allowing you to remove it.
STEDI LED Headlight Upgrade and Driving Lights
I decided to install a LED headlight as a bit of an experiment and also so it would match the light colour the two driving lights I was intending on installing as daytime running lights where the indicators were.
This was a bit of a gamble as I didn’t take into consideration that the Himalayan headlight body is recessed to account for the instrument panel. Once I got the kit I thought how is this all going to fit inside.


The H4 LED Headlight Upgrade kit comes with a H4 LED globe with a massive heatsink and a control module the size of a match box.
I was right it didn’t fit.
The power cable comes out of the back of the heat sink and was being bent at 90 degrees pressing hard against the housing and the headlight still would not close properly.
So I made the decision to forge ahead and drill a hole for the wire in the back of the housing directly behind the globe heatsink and mount the controller under the instrument panel with double sided tape.
Problem solved.
`
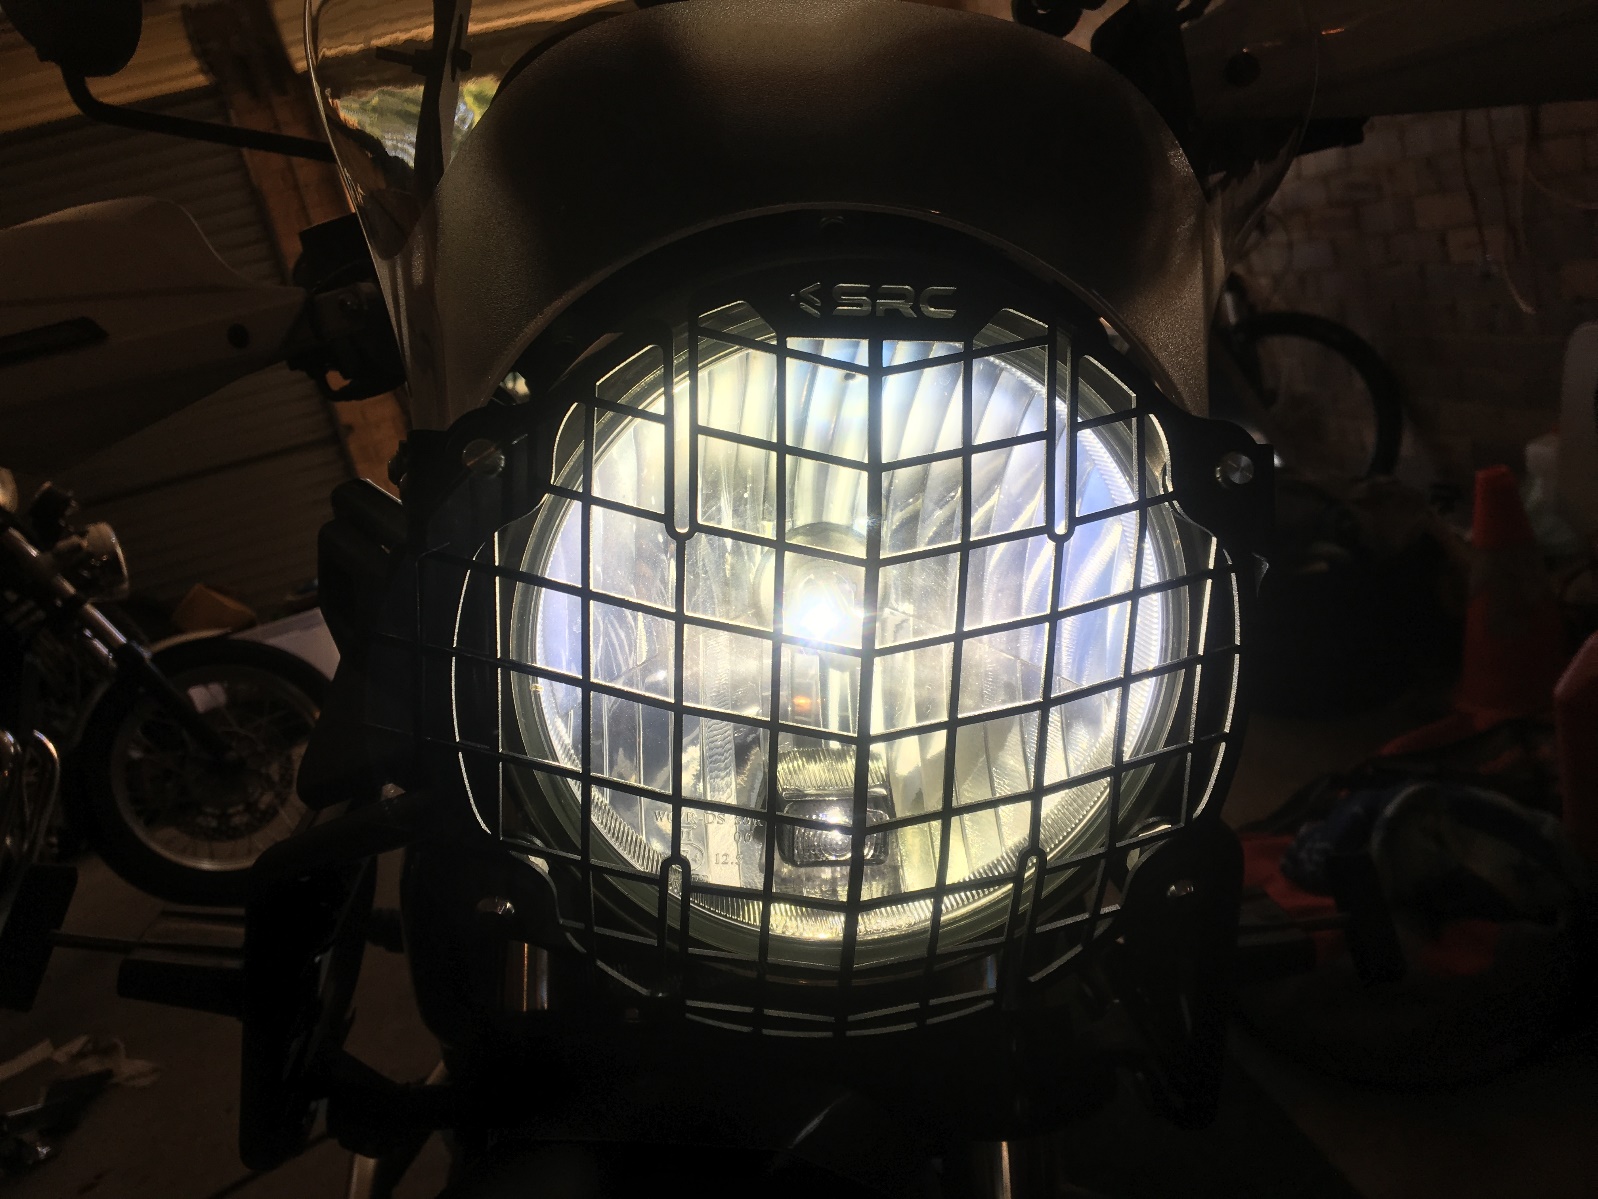
I installed the small MC5 5w DRLs (Daytime Running lights) next to the headlight where the indicators were mounted on the side bars. I used the 2 left-over 6mm couplers as stand offs and some various washers and bushes to fix them to the blinker mounts.
PHOTO
I fitted the slightly larger and more powerful MCX10 10w LED driving lights to the SRC crash bars using STEDI Bull Bar Mounts
FUSE BOX
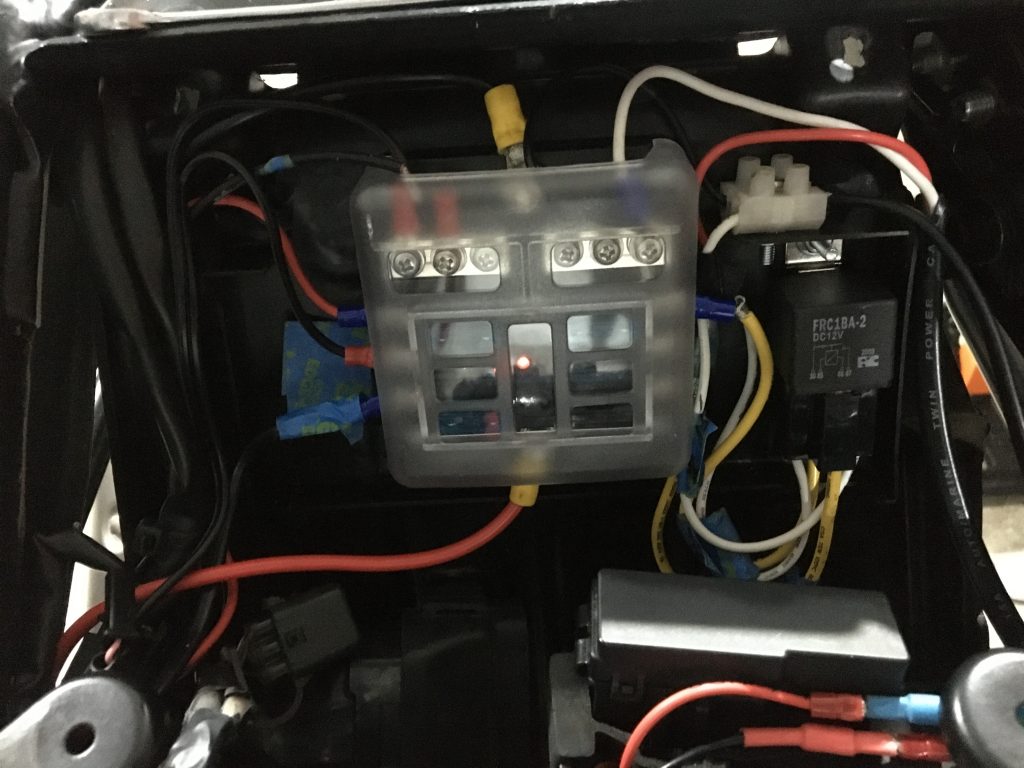
I needed to install a fuse box which was an idea I got from a fellow member of the Himalayan page on Facebook, Ossie, who mounted a Jaycar 6 way Fuse Box with bus bar under the seat in the small compartment built in to the rear guard. This is used to managed connections for the Driving Lights, GPS, Heated Grips and Switch illumination
I pulled the seat and tank off and the inner guard so I could mount the fuse box and relay to it. I had to trim the tool compartment to fit it in and also to get better clearance I heated up the seat base with a hot air gun and moulded the plastic to fit by installing it and sitting on it to shape it to the fuse box , once it cooled the seat base cleared the fuse box .
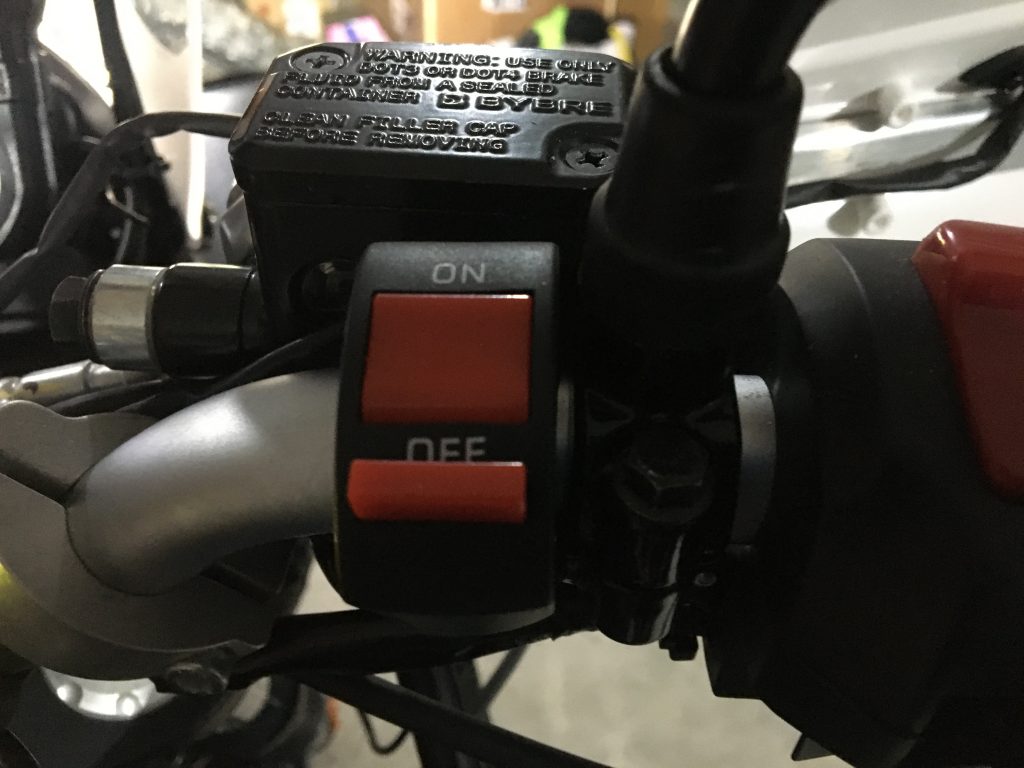
Once the lights and relay were wired up I connected the GPS and USB power cables, which were originally directly connected to the battery, to the fuse box and then connected the power cable for the heated grips. I also installed a jumper cable and some connectors for the ABS bypass switch so it can be turned off on the fly. I chose not to cut the wire, instead I pulled the connector out of the fuse box and made a jumper cable and then ran it and the original wire to the two connectors you see in the foreground and then up to a switch on the bars.
See here for some info on how to wire up the ABS switch https://www.youtube.com/watch?v=oTWdykKZLY0&t=323s
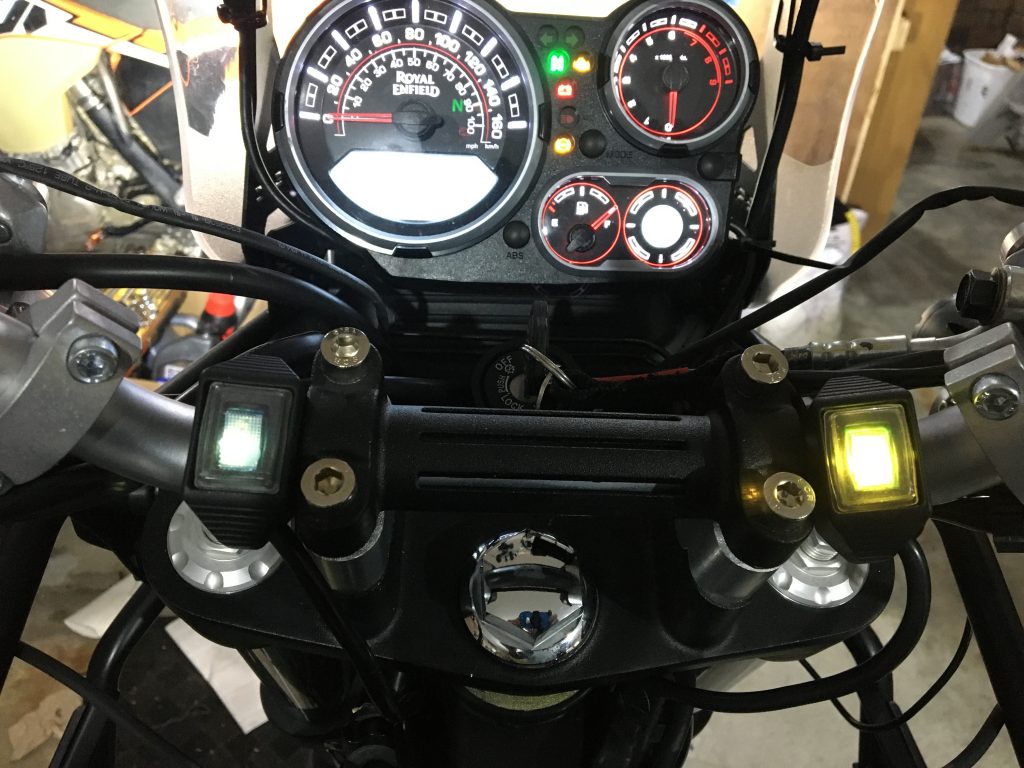
I connected the 5W LED Lights to the headlight circuit and installed connectors and some wires to run to a SW Motech EVO Fog Light Switch so I could turn them off.
I ran another cable and connected it to the relay and the SW Motech EVO High Beam Switch for the 10W LEDs
I installed both the Switches on the bars near the clamps as with the heated grips controller on left and ABS switch on right there was not much room left
Since they are illuminated, I ran some wires up from the fuse box to power the switch lighting.(they need a positive feed)
Oxford Heated Grips
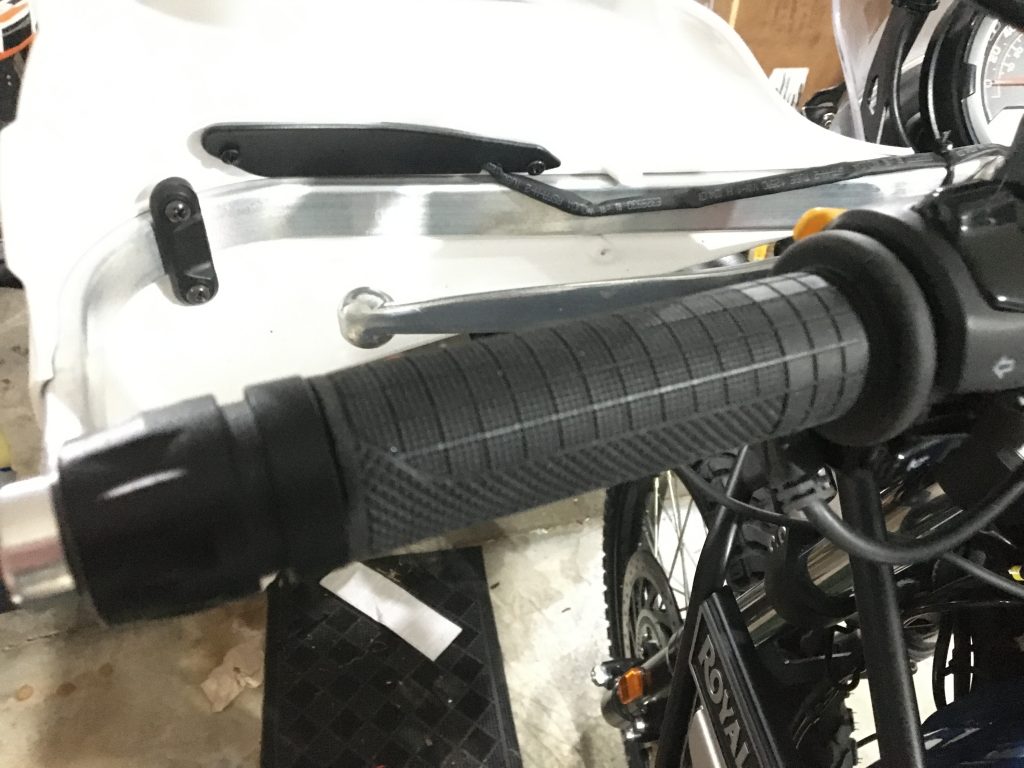
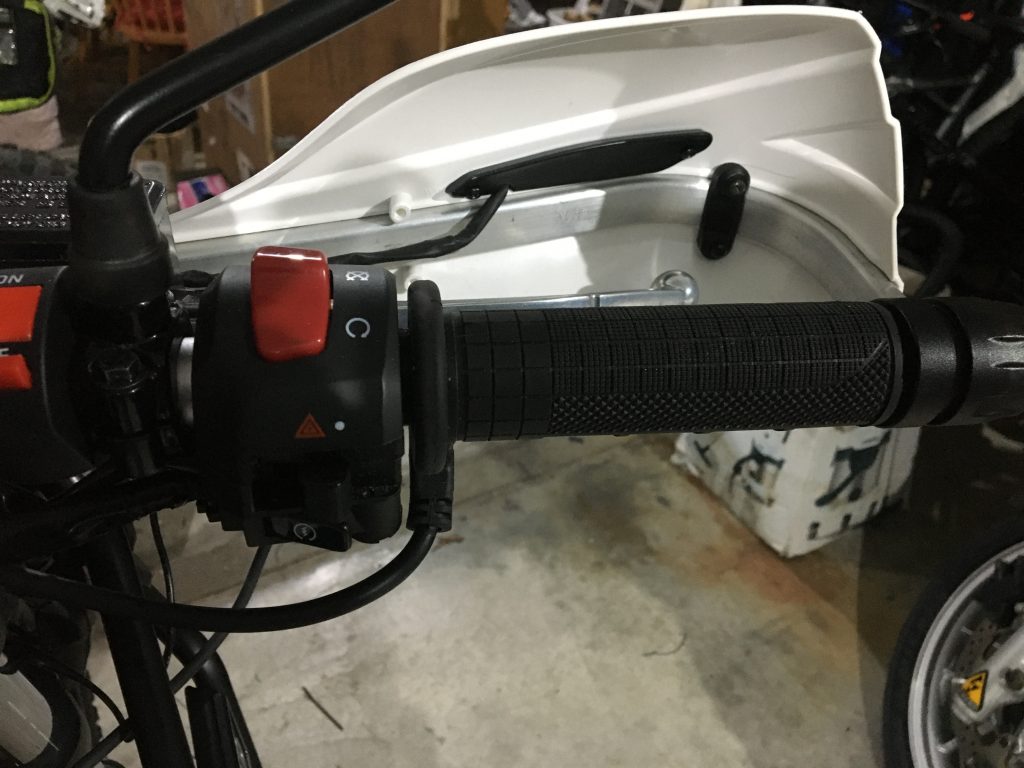
I had to plie the original throttle grip off by using a long thin phillips screwdriver between the throttle and the grip to break the glue bond and then I peeled the grip off the throttle tube. Then I needed to remove the flanges and ridges on the plastic throttle tube with a stanley knife in order to get the Oxford Throttle Grip on.
Don’t take the ridges off completely as this will make the throttle too small in diameter, however don’t make it too tight or you won’t get the grip over the throttle and the fast acting super glue will dry and bond the grip in the wrong position. Test fit them a few times as a practise go (I.E. measure twice cut once) before applying the super glue or you will stuff it up like some pommy bloke on youtube did. ( Also don’t use an angle grinder to remove the ridges and take the time to open the throttle housing and remove the throttle tube which takes a few seconds, or you will bugger up your throttle housing like he did ) SEE VIDEO
I needed to trim just a bit off the end of the grip so it cleared the bar weights on both sides and also so it did not jam the throttle. Oxford manual shows two points that are marked on the grips themselves where you can trim, One at the end of the grips texture and one just before the end-flange of the grip, I cut in between these two points as this seemed to be the perfect length.
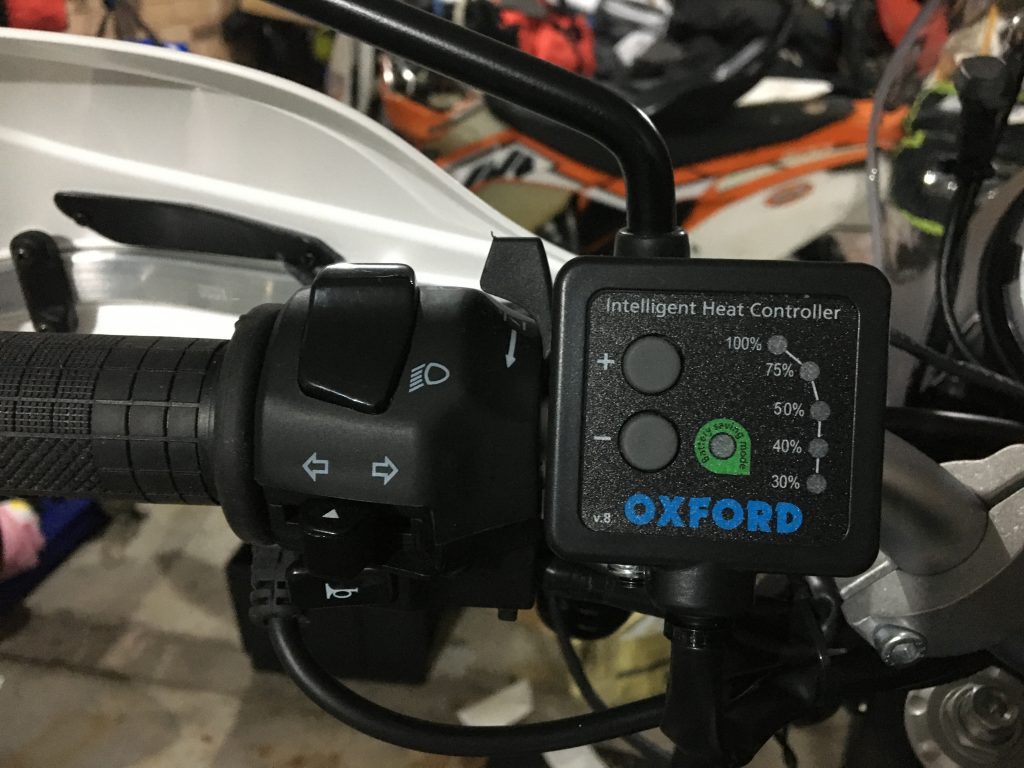
OXFORD CONTROLLER
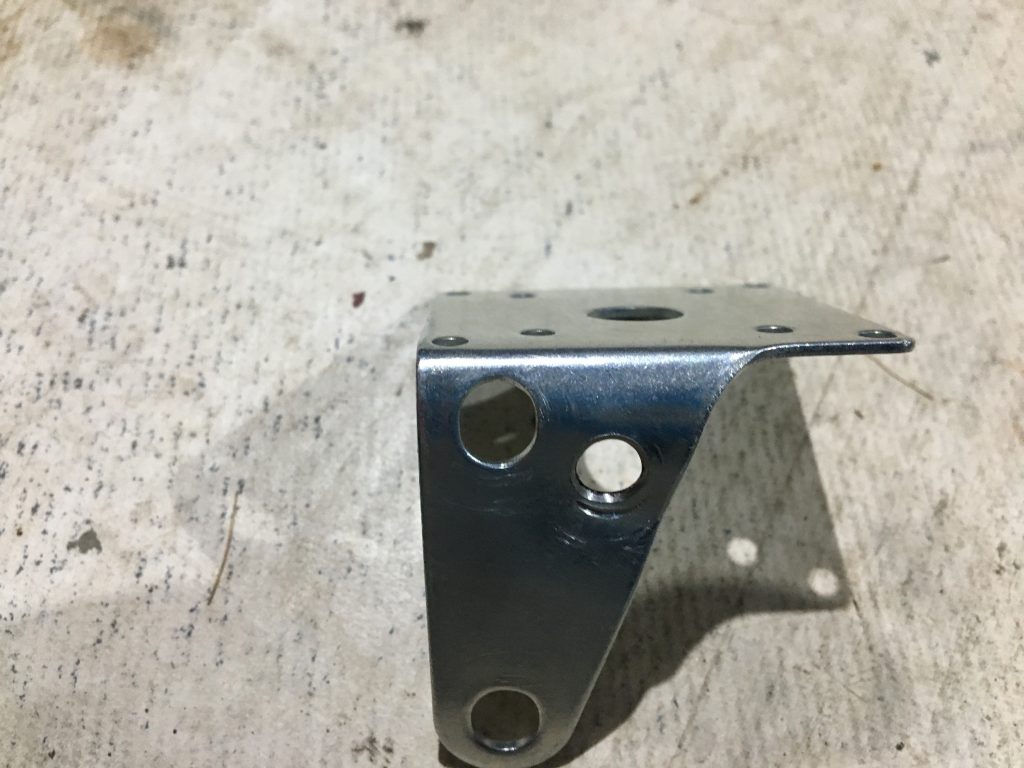
The mount for the controller is designed for a bike with two horizontal bolts on the clutch perch, but Enfileds only have one vertical bolt. to get around this after discussing on Facebook Groups, I turned it upside down and drilled a hole slightly offset from the original hole for clearance SEE PHOTO. Then I bent the face of the mount forward to angle the controller for a better view. I also replaced the pinch bolt with one from Bunnings a M6 35 MM Black round head allen bolt. I screwed it in then put one of the supplied black nuts on the end as a spacer, which stopped the bracket rubbing on the clutch perch and then fixed the bracket with a M6 Nyloc Nut.
This lined up the controller perfectly with the bars
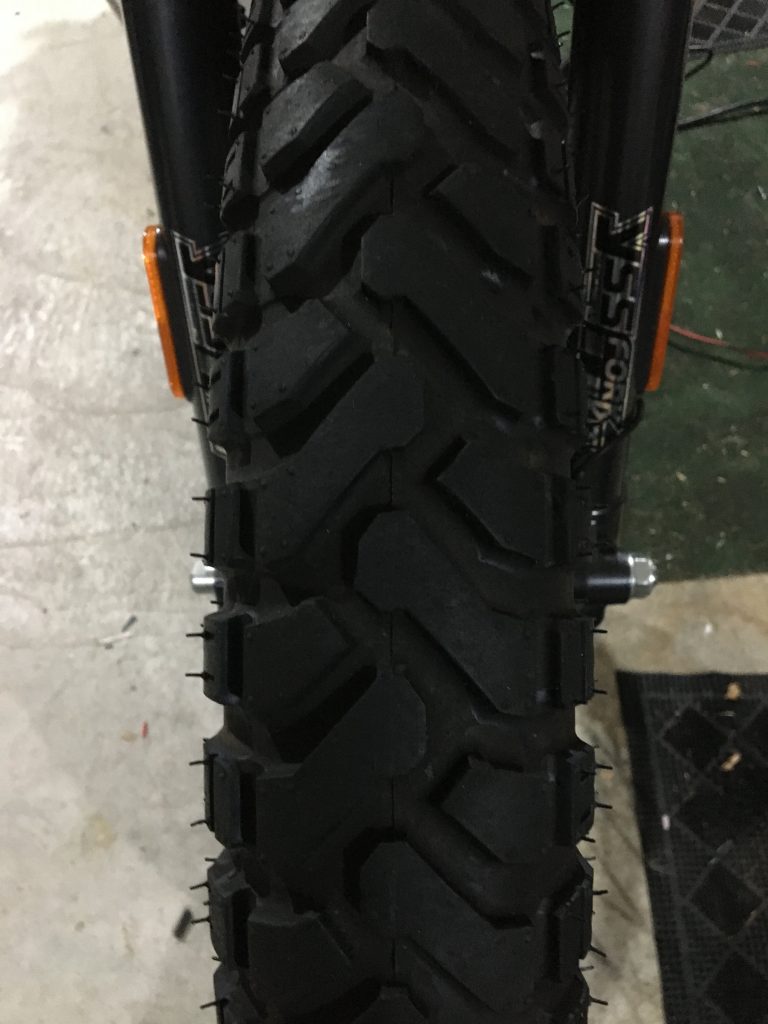
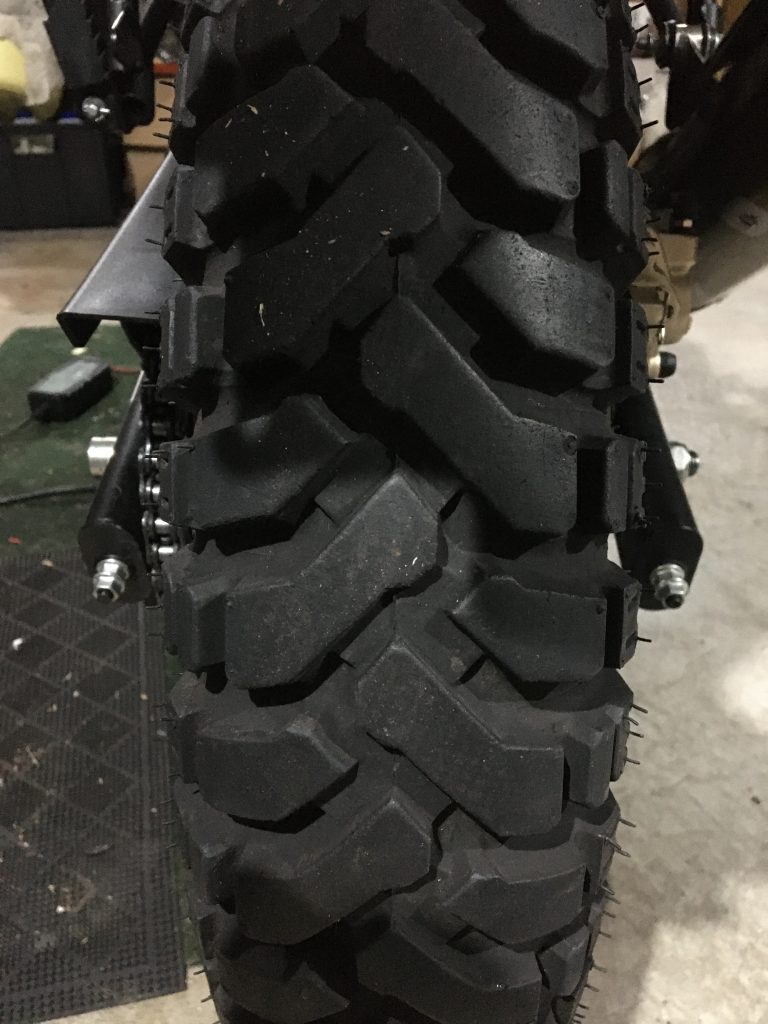
Mitas E07 Enduro Tyres
In another post where I went on a ride with a mate from the Royal Enfield Club on our Himalayans to the Watagans Forest , I had just put some new tyres on my 2017 HImalayan as it came with almost road tyres. Lucky I did as we were axle deep in mud and these new tyres saved the day (for me anyway Peter got bogged)
When I sold the bike I did a deal with the guy to transfer the CEAT tyres that came on the 2021 model onto the old bike and I kept the Mitas tyres and had them fitted on the new bike.
Fuel Pump Relay
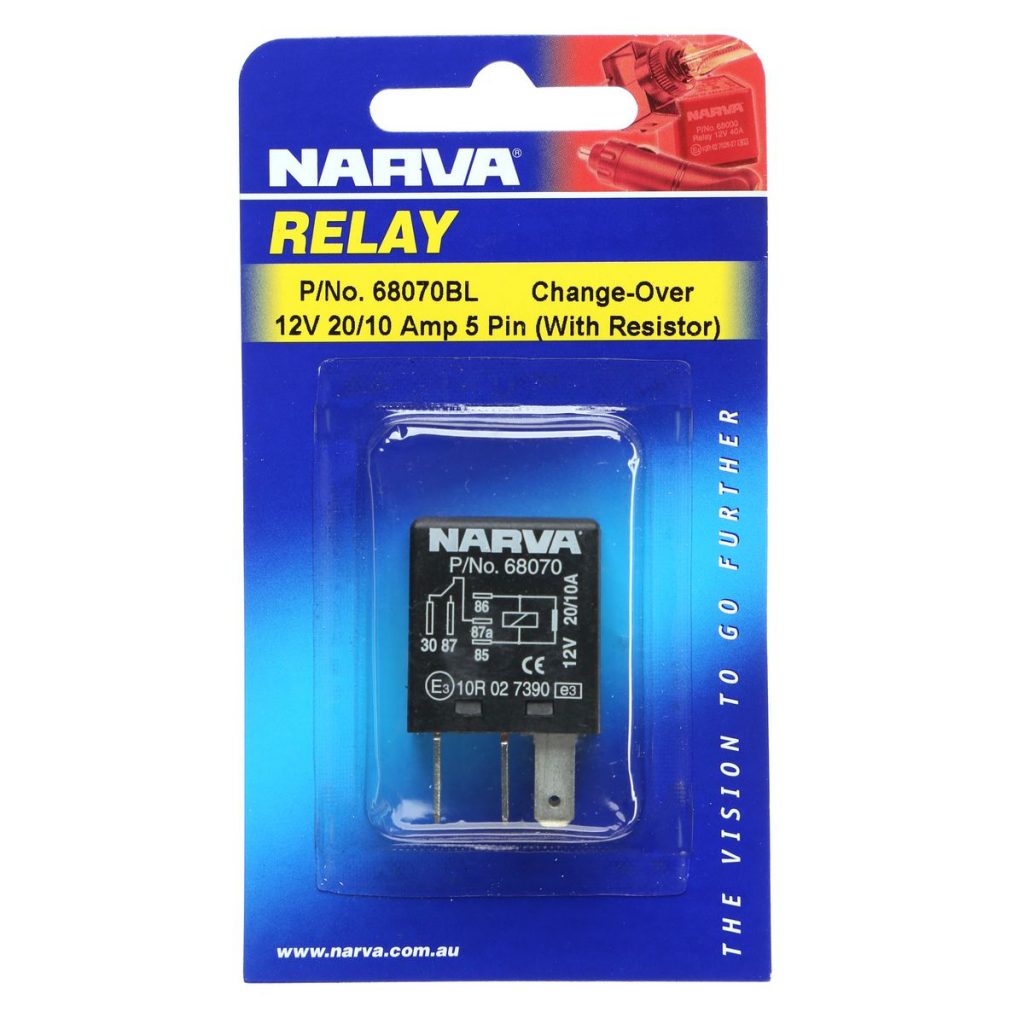
There have been a few cases where people have experienced their Himalayans cutting out. This has been attributed to the fuel pump relay intermittently failing or completely dying, As a precaution I replaced the relay with a Narva Micro Relay – 68070BL .Just incase I also replaced the other relay next to it on the right hand side which is the Side Stand Relay. ( Friday beer o’clock I was too lazy to take a photo)
You can get them from Repco for $18ea or Spares Box for $9.95 plus freight, which works out better if buying 2 or more if you have a mate with a EFI himalayan.
I will probably carry the OEM relay as a spare just in case the problem is the relay failing due to some electrical inconsistency rather than the relay itself.
Tank Paint Protection
When I went for a ride on my Triumph Tiger wearing knee guards i was shocked to find that they had scratched the plastic tank to the point that I couldn’t buff it out and had to hide the scratches with Armorall. The same thing happened on my KTM Enduro bike when I started wearing knee braces after an injury and it not only rubbed the decals off the bike but wore through the leather pads on my MX pants. So since a lot of off road riding requires one to stand and considering I will be wearing knee guards, I thought about putting rubber knee pads on the Himalayan. I had recently purchased some Motone Union Jack rubber knee pads for the Interceptor but apart from being expensive I gathered that the rubber ones I had seen for the Himalayan would be too grippy for off-road stand-up riding as you want to be able to move around and change your body position on the bike a bit.
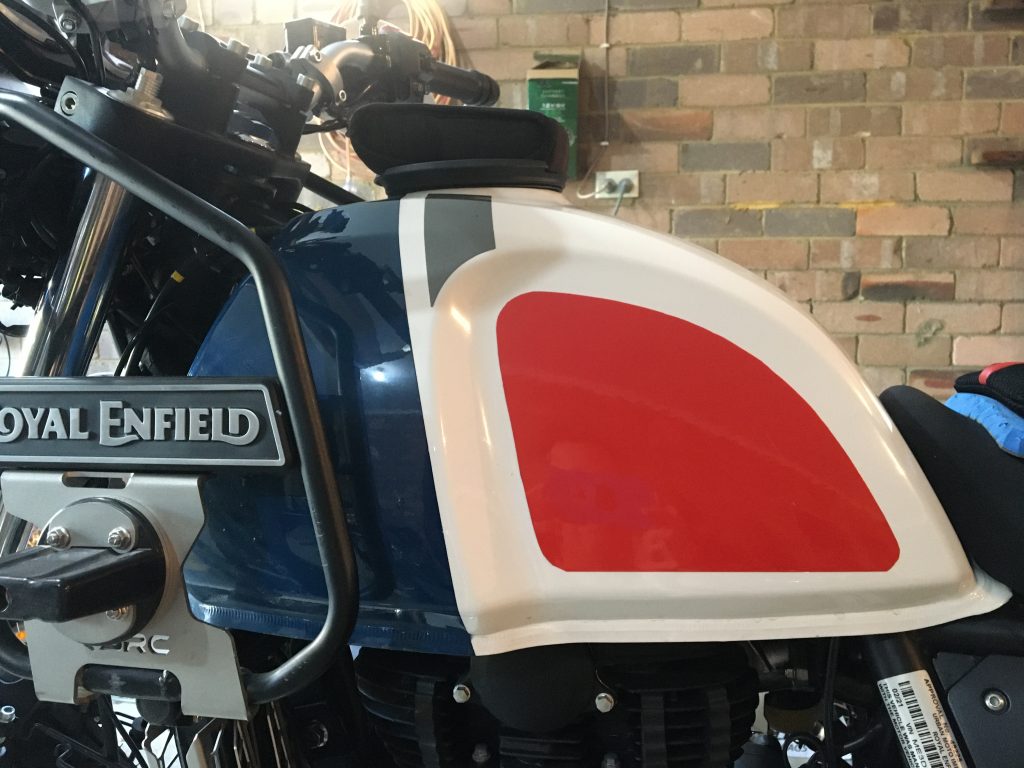
I have used 3M clear adhesive in the past for automotive paint protection and also on surf craft for ding protection. As is happens, I found some coloured heavy vinyl graphics backgrounds for MX bikes at MX Store. and came up with the idea to do some color changes for a bit of bling
I got some red, white and blue 0.5mm vinyl by Blackbird Racing from MXSTORE and started with the tank but will cover some other parts of the bike as well.
I made a template from a google image and cut out the shape on paper first and test fit it to the tank before cutting the red vinyl and applying it.
I also cut some white vinyl and placed it under the seat horn where it meets the tank as dirt and dust can get in between the tank and the seat and rub the paint off
UPDATE
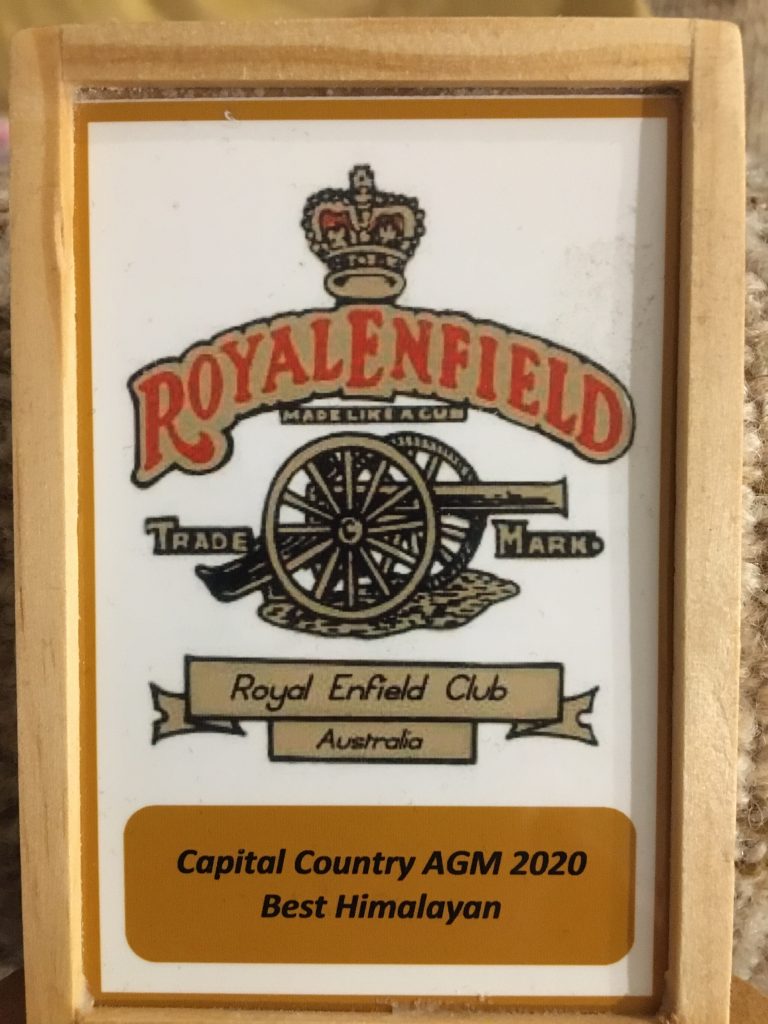
Best Himalayan Trophy
At the Royal Enfield Club of Australia 2020 Capital Country AGM held at Sutton in March 2021 (due to Covid)
I was fortunate enough to be awarded the Best Himalayan trophy


Recent Comments